
Setting up paperless-gpt
paperless-gpt is a separate assistant next to your Paperless-ngx: it suggests titles, correspondents, document types, tags and dates for new documents, works fully automatically if you want it to, and reads difficult scans using a vision model. At server.camp you get it through the AI features add-on — with a preconfigured language model, so you need neither your own API account nor a graphics card.
- A dedicated interface at
https://<your-paperless-domain>/gpt/for reviewing and applying suggestions - Control via tags directly in Paperless-ngx, and with the automation tag tagging runs without any input from you
- AI OCR for documents where classic text recognition fails
- Customizable prompts so the suggestions match your documents
- A language model we provide, running on European infrastructure (Scaleway, Paris)
PrerequisitesAn active Paperless-ngx subscription at server.camp. The AI features add-on is available in all plans (Startup, Business, Corporate) and, besides paperless-gpt, includes the language model for the AI built into Paperless-ngx.
Only after suggestions inside Paperless?You can also use the AI built into Paperless-ngx 3.0 at no extra cost with your own language model — suggestions and document chat, configured directly in Paperless-ngx. paperless-gpt pays off once you want fully automatic tagging, fine-tuned prompts or AI OCR on top of that.
In the customer portal, open the settings of your Paperless-ngx instance (gear icon) and enable the AI features add-on. The related fields then appear in the “Artificial intelligence” section — the following ones apply to paperless-gpt:
| Field | Default | Meaning |
|---|---|---|
| Deploy paperless-gpt | On | Only need the built-in AI? Then feel free to untick it. |
| Password for paperless-gpt | – | Protects the interface at /gpt/. The username is always paperless. |
| Language model for paperless-gpt | Gemma 4 26b | Produces the suggestions and the AI OCR. You can pick Gemma 4 26b (recommended) or Mistral Small 3.2 24b — both multimodal, both running at Scaleway in Paris. |
| Document language | German | The language most of your documents are written in. Improves the accuracy of the suggestions — the setting applies to paperless-gpt and to the built-in AI. |
| Assign tags automatically | Off | Creates additional tags in automatic mode. Without this option your tags stay untouched. |
| Set document date automatically | Off | Reads the date from the document in automatic mode and applies it. |
| Page limit for AI OCR | 10 | Maximum number of pages per document processed by AI OCR. 0 removes the limit. |
| Excluded correspondents | – | Comma-separated names that should never be suggested as a correspondent — e.g. your own company name. |
If you untick Deploy paperless-gpt later, the service is removed on the next deployment; your customized prompts and settings are kept and apply again when you re-enable it. The same goes for cancelling the whole add-on — see Cancelling the add-on for what else happens then.
Provisioning takes one to two minutes after saving. The interface is then available at https://<your-paperless-domain>/gpt/; your browser will ask for the username (paperless) and the password you set.
The password protects your documentspaperless-gpt has no built-in authentication. That is why we place a password in front of/gpt/— choose it carefully and share it only with people who already have access to your entire archive.
We wire up the connection to Paperless-ngx automatically during deployment. To do so we create a service account called paperless-gpt with an API token in Paperless-ngx — you will see it in the user management, but you do not have to maintain it.
Everything is controlled through tags in Paperless-ngx. We create these three trigger tags for you during deployment – you will find them in Paperless-ngx under “Manage” → “Tags”:
| Tag | Effect |
|---|---|
paperless-gpt |
The document shows up for review in the paperless-gpt interface. |
paperless-gpt-auto |
The document is processed fully automatically, without any manual review. |
paperless-gpt-ocr-auto |
Triggers AI text recognition. |
On top of those there is paperless-gpt-failed: paperless-gpt applies it itself when processing a document failed — you do not have to create it.
Feel free to change the colors and descriptions of the tags – only the names have to stay, because that is how the assistant recognizes its documents. If you delete one of the three trigger tags, we recreate it on the next deployment.
Review first, automate laterStart withpaperless-gpt, not withpaperless-gpt-auto. That way you get a feel for how well the suggestions fit your documents and can fine-tune the prompts before automation starts writing without asking.
If you would rather not assign the tag manually every time, use a Paperless-ngx workflow to attach it to every newly ingested document.
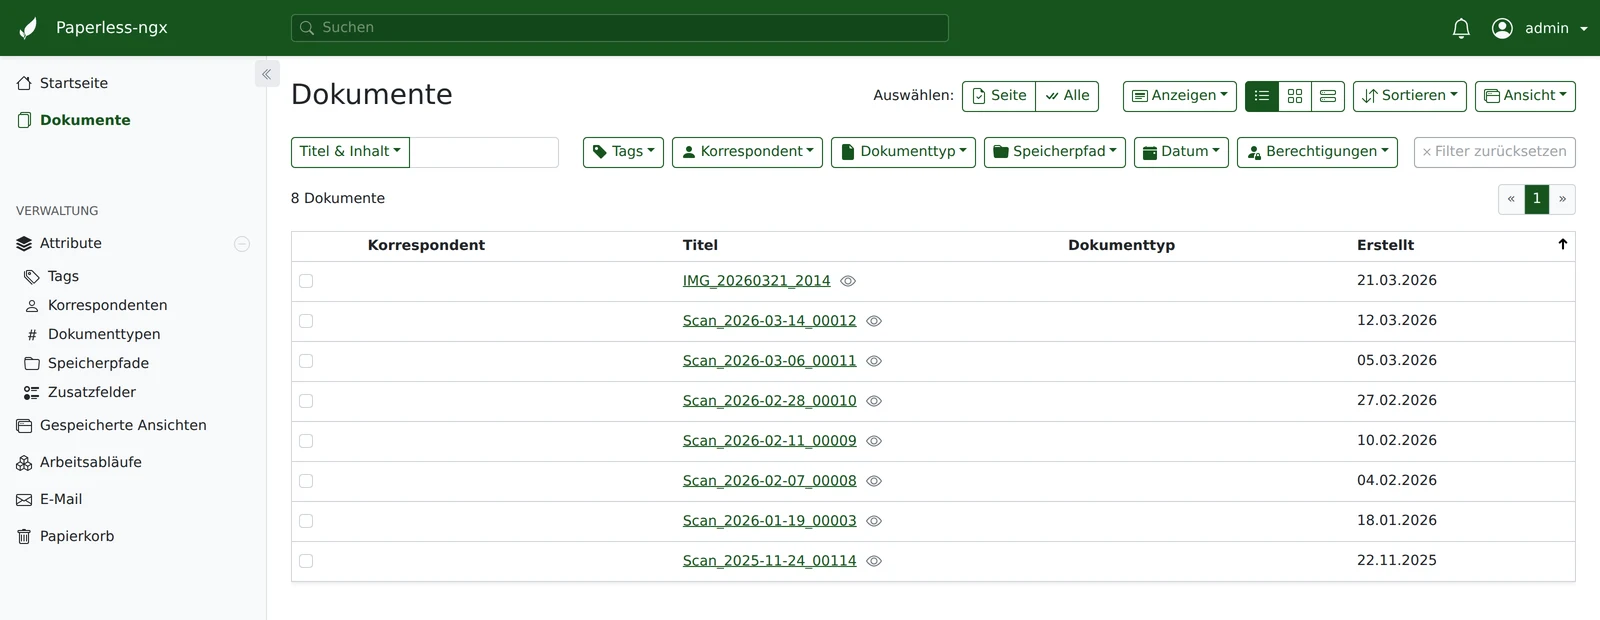
Freshly ingested scans usually carry nothing but the scanner’s file name — no title, no correspondent, no tags:
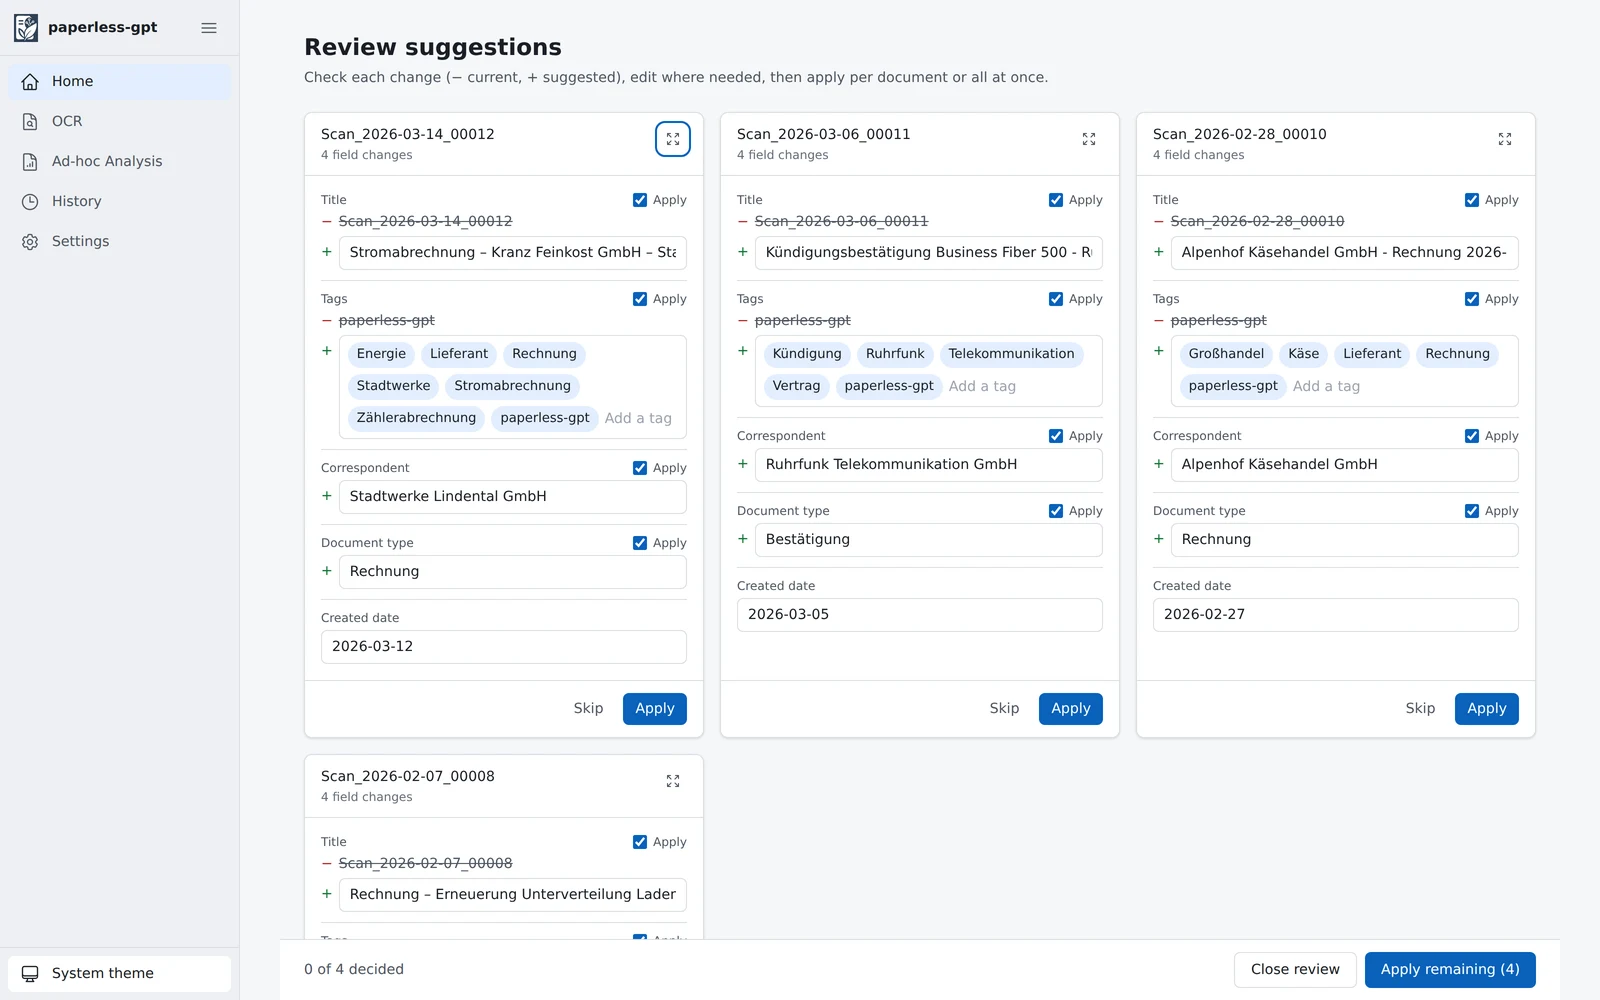
As soon as a document carries the paperless-gpt tag, it appears in the review view shortly afterwards. Each field shows the current value (–) next to the suggestion (+), so you can see what would change. Individual fields can be unchecked, the rest is applied via “Apply”:
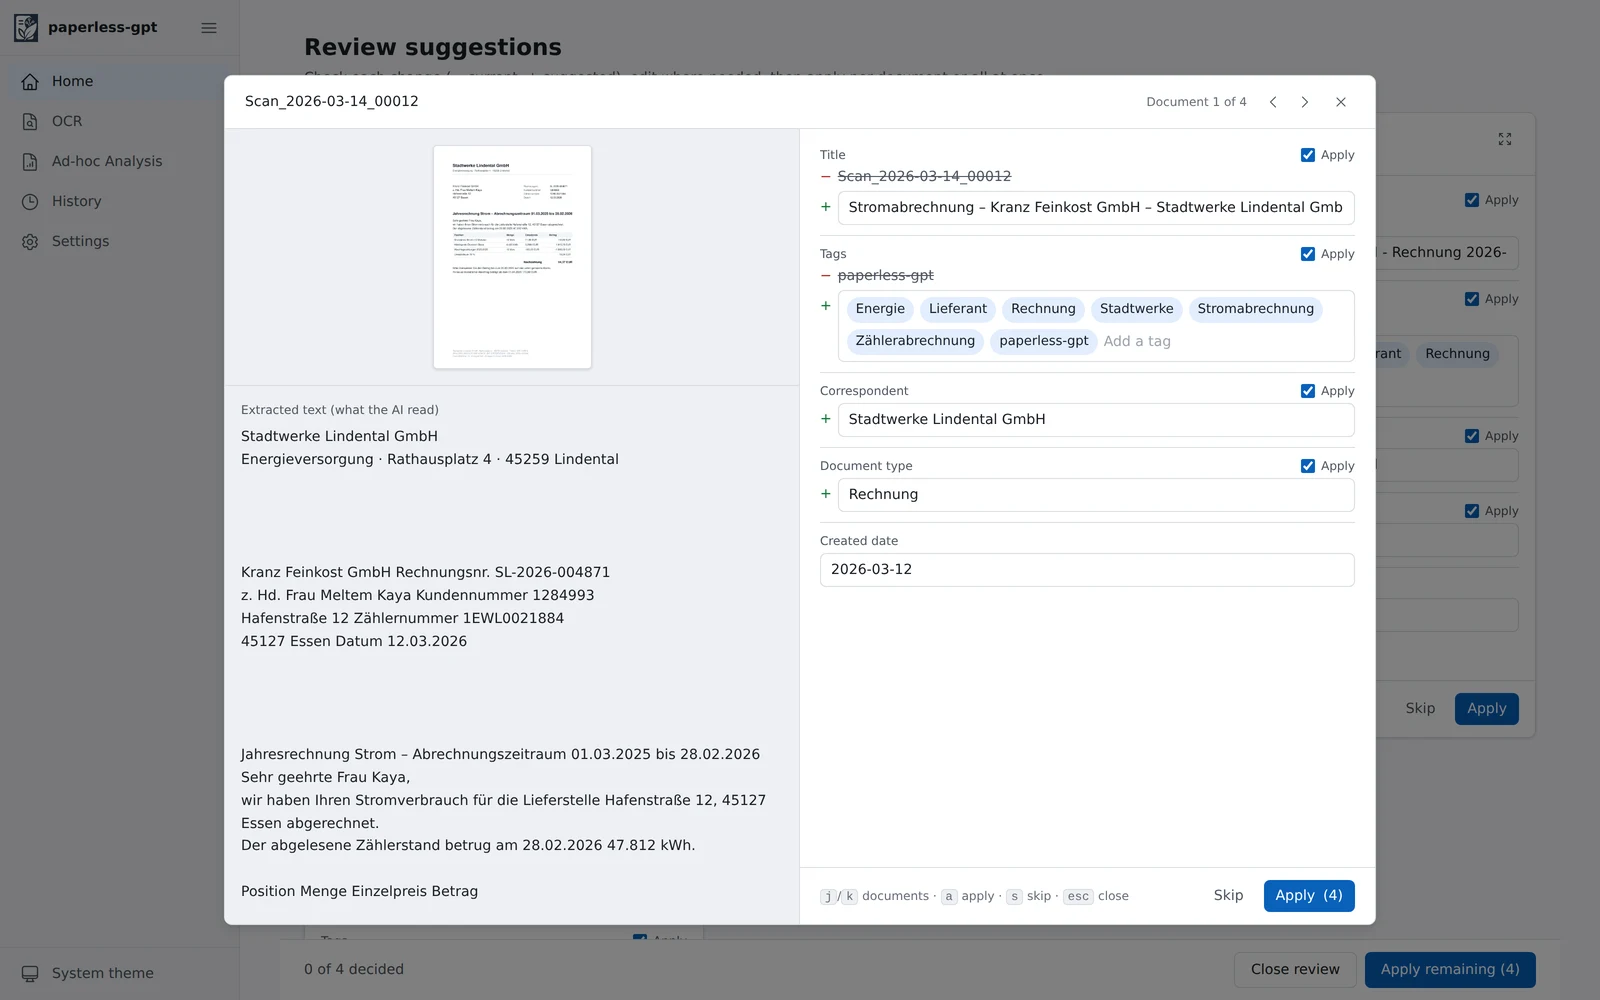
The detail view shows the scan and the recognized text on the left and the suggestions on the right — remove tags, correct the title or date, then apply:
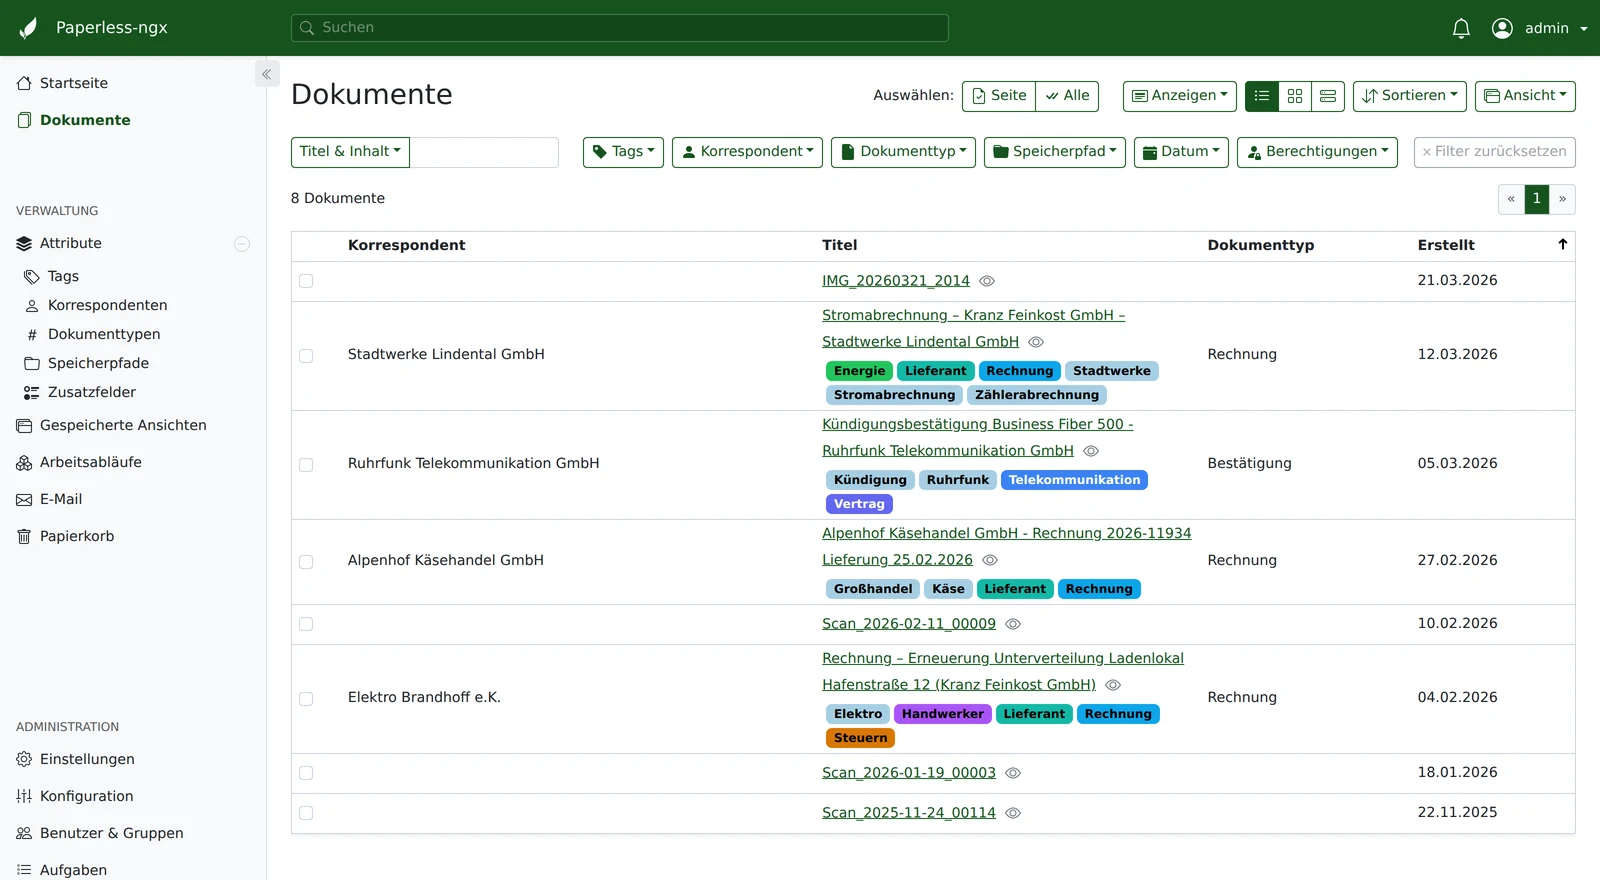
Afterwards the documents are fully tagged in Paperless-ngx:
Every change is recorded in the history and can be traced there field by field.
Besides metadata, paperless-gpt can handle text recognition using a vision model. This pays off for documents where Tesseract fails: photos taken at an angle, low contrast, nested tables. Attach the paperless-gpt-ocr-auto tag to the document, or start recognition manually from the “OCR” menu entry.
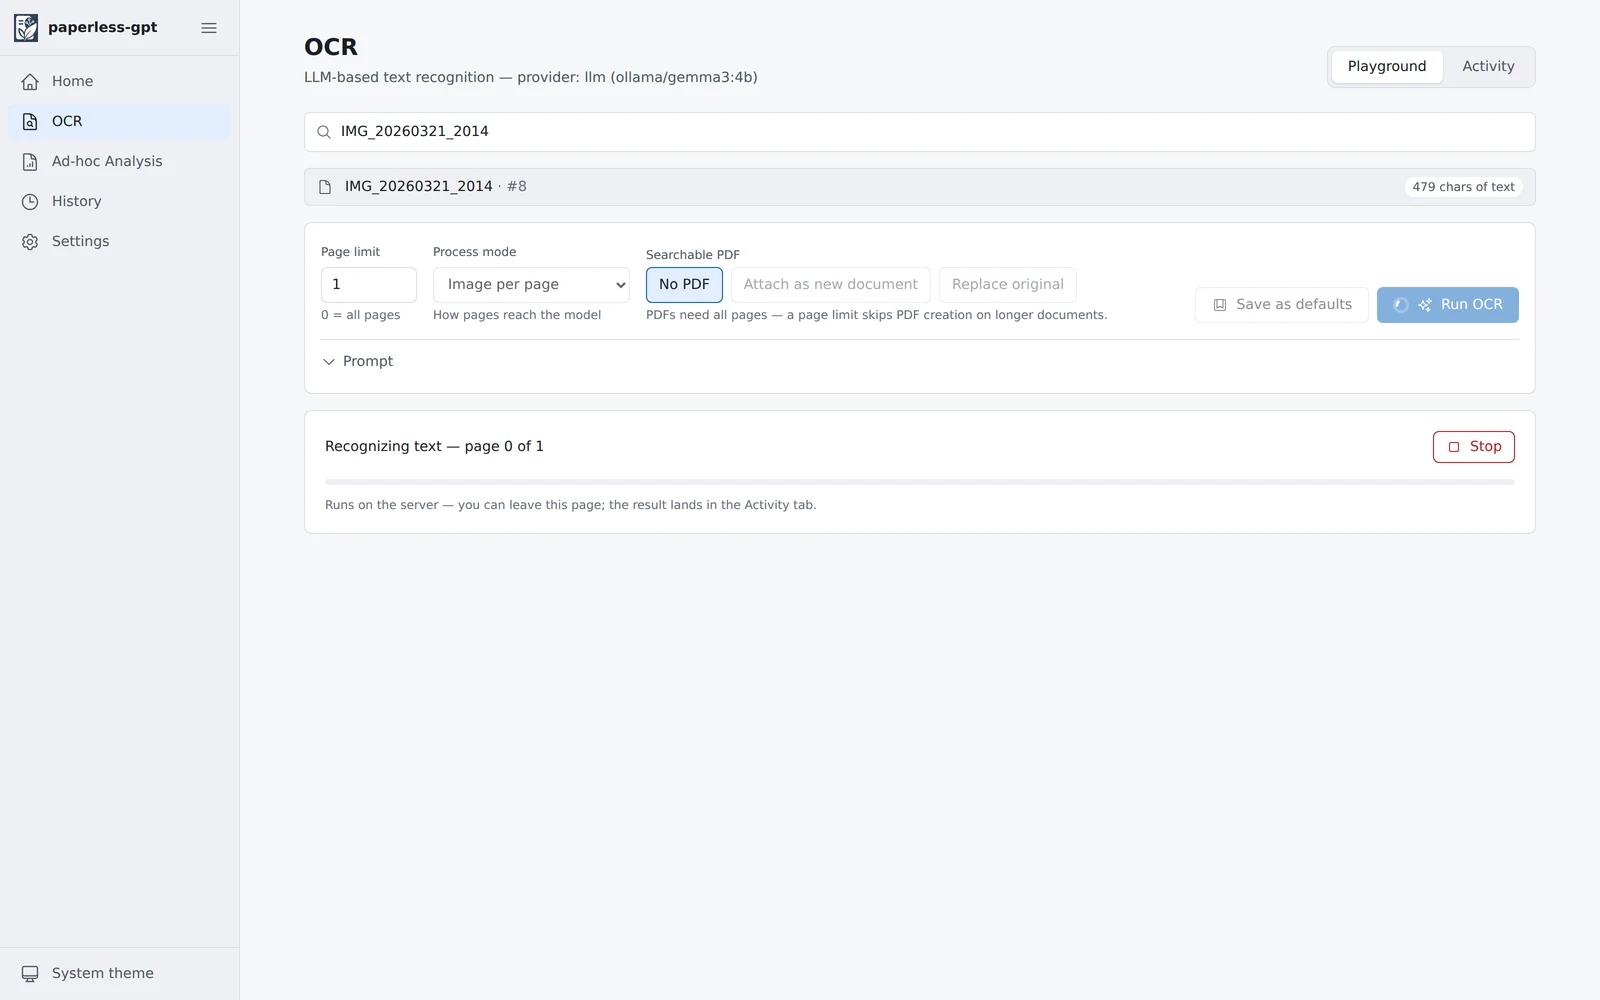
Tesseract remains the baselineAI OCR is meant to complement regular text recognition for the hard cases, not to replace it. The page limit (default: 10 pages) caps how much of each document is sent through the model.
At server.camp it is also the only route to AI-assisted text recognition: we do not currently offer the remote OCR via Azure AI that Paperless-ngx 3.0 brings.
Under “Settings” you can edit the prompts paperless-gpt uses to talk to the model — separately for title, tags, correspondent, document type, date, custom fields and OCR. Changes take effect immediately, no restart required.
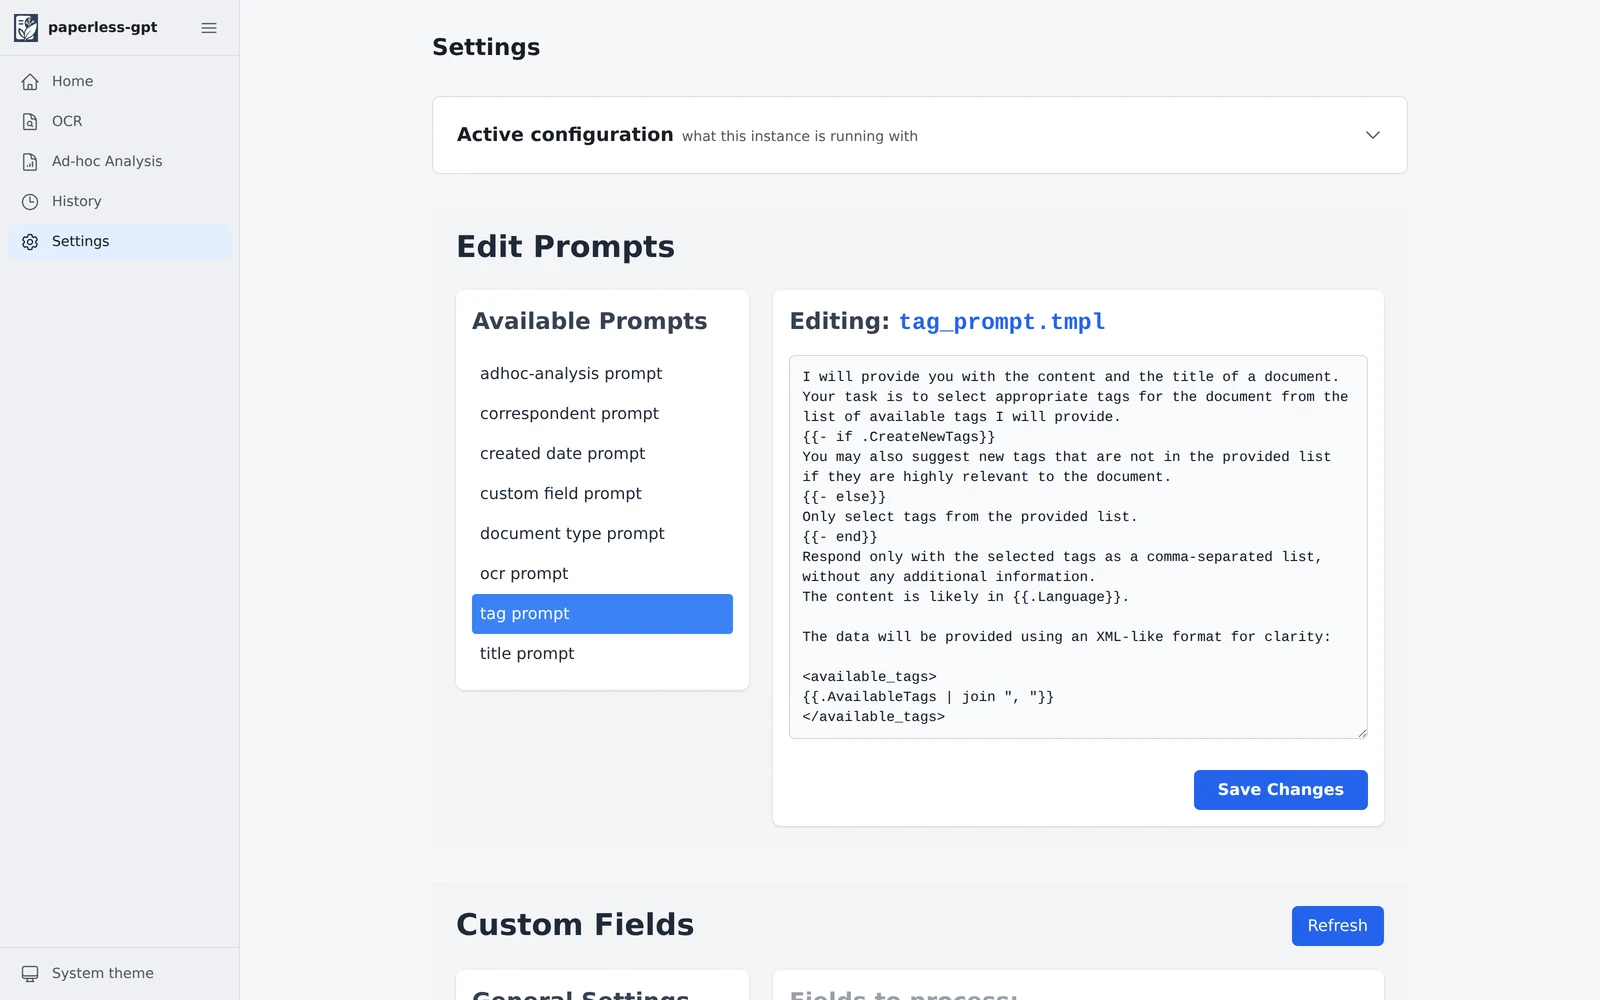
This is useful, for example, to enforce a fixed title scheme (“correspondent – document type – date”) or to teach the model industry-specific terms. Your customizations survive updates.
The content needed for tagging is sent to the selected language model. We do not run our own GPUs for this but use Scaleway’s Generative APIs, hosted in Paris:
- Processing takes place inside the EU.
- The submitted content is not used to train the models.
- No account with a US provider is involved.
If you would rather not have certain documents processed by AI, simply do not assign any of the trigger tags to them — without a tag, nothing is sent to the model.
The interface at /gpt/ keeps asking for the password.
The username is paperless (not your email address). If you forgot the password, set a new one in the settings of your instance in the customer portal.
Nothing happens even though the tag is set.
Check the exact spelling of the tag — it has to be paperless-gpt or paperless-gpt-auto. The assistant polls Paperless-ngx at short intervals; a delay of up to a minute is normal.
A document was tagged paperless-gpt-failed.
paperless-gpt could not write back all suggestions — usually because the model returned an implausible date. The remaining fields were still applied; the document just needs a quick look from you.
The suggestions do not fit the content. Check the configured document language first, then the prompts. Switching to a different language model can help too — the setting can be changed at any time in the customer portal.
If you get stuck, reach out to support@server.camp.